Here’s What’s Coming from Apple in 2019

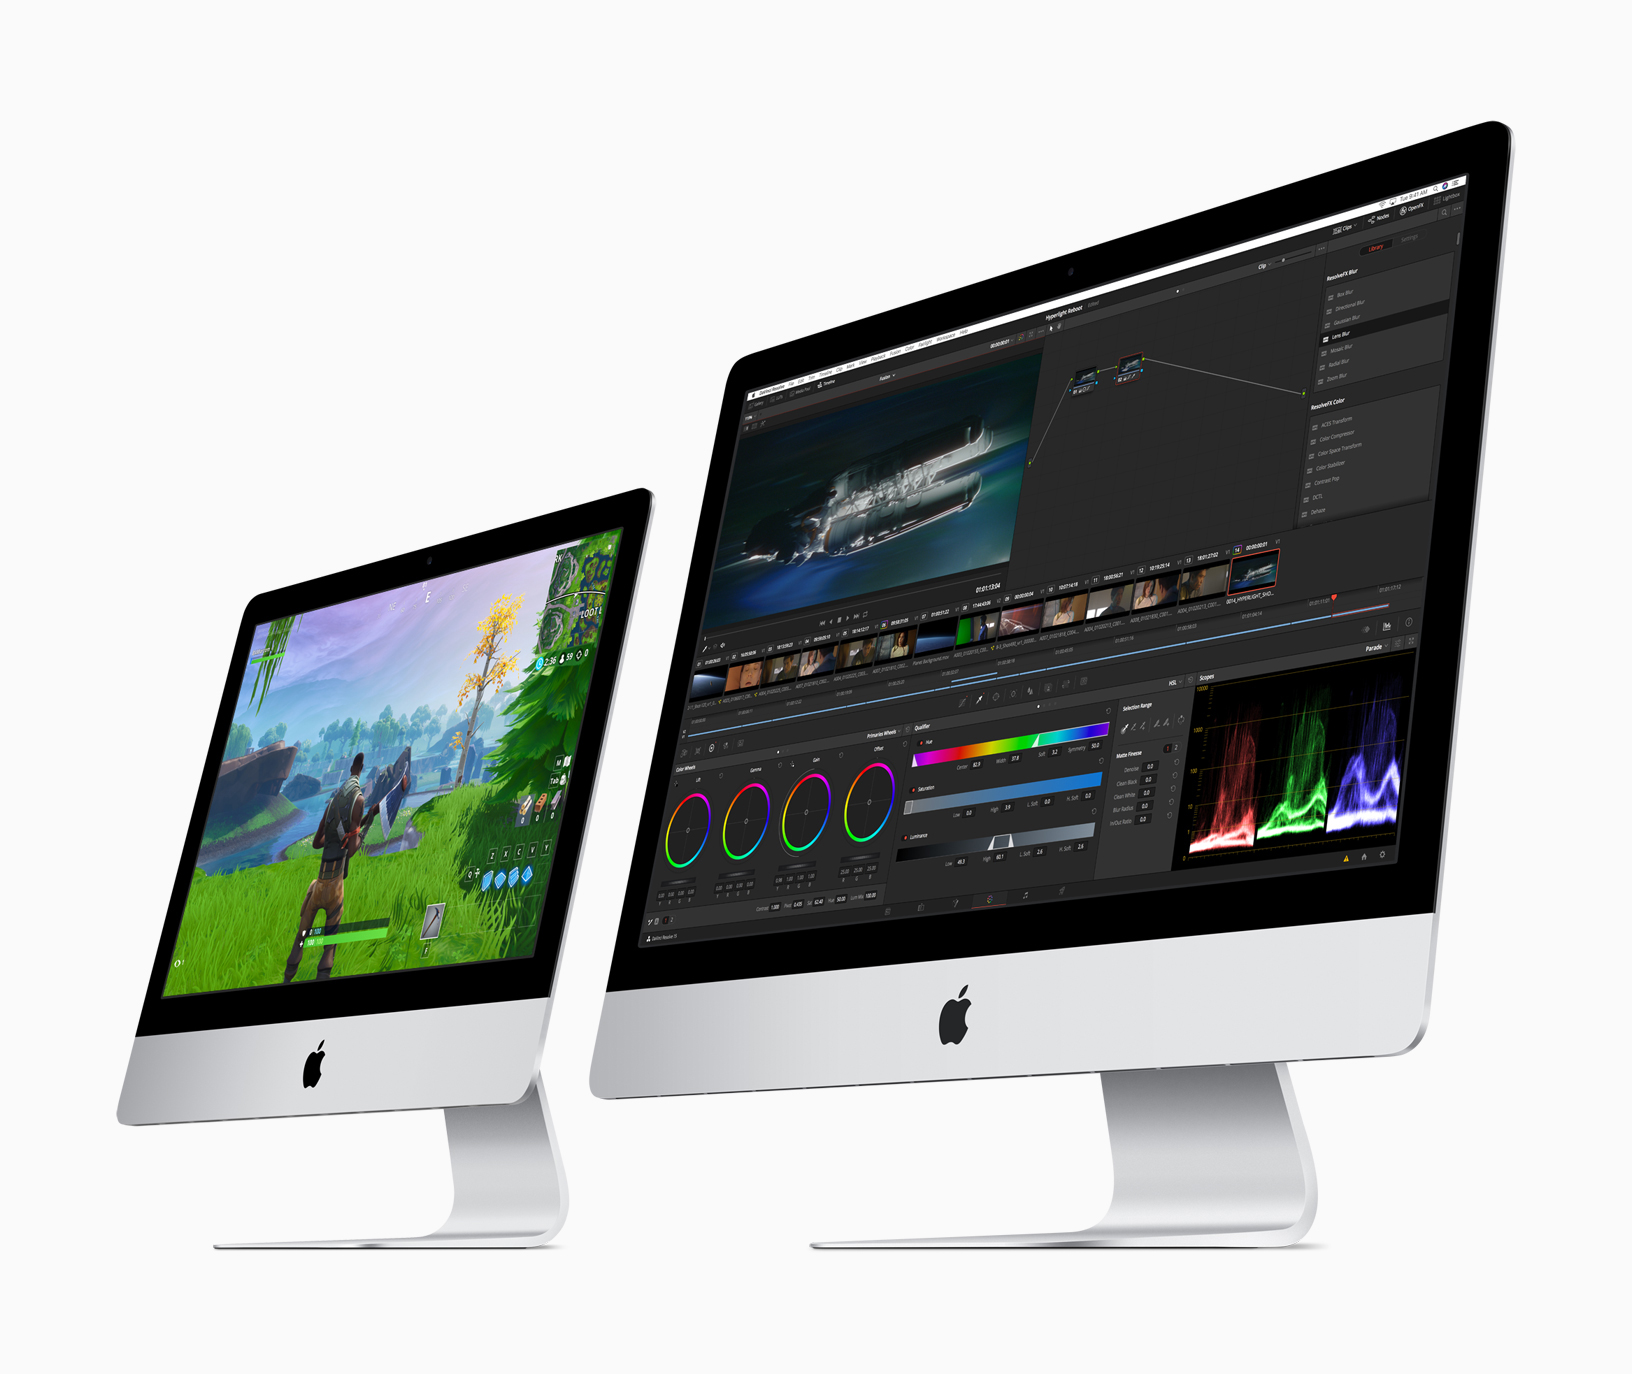
At Apple’s Worldwide Developer Conference on June 3rd, the company unveiled the next versions of all its operating systems—macOS 10.15 Catalina, iOS 13 (and a new iPadOS), watchOS 6, and tvOS 13–along with the much-anticipated new Mac Pro and Pro Display XDR. 

Nothing that was announced will ship until later this year—probably September—but we wanted to give you a quick overview of what’s coming down the pike.

macOS 10.15 Catalina

With macOS 10.15, which Apple is calling “Catalina,” the company is working to bring macOS and iOS ever closer while preserving what makes the Mac special. 

For instance, Catalina replaces the increasingly overloaded iTunes with three new apps that mimic those in iOS: Music, Apple Podcasts, and Apple TV. Reminders, Notes, and Photos also see significant enhancements that are mirrored on the iOS side, and a new Find My app on both platforms combines the capabilities of Find My iPhone and Find My Friends. Apple is even bringing Screen Time from iOS to the Mac to help you track and control your usage—and that of your kids—across all your Apple devices.

Some of these apps exist on the Mac thanks to Project Catalyst, an Apple technology that makes it easy for developers to convert iOS apps to the Mac. Apple used Catalyst internally last year to bring Home, News, Stocks, and Voice Memos to macOS 10.14 Mojave. This year, Apple is letting third-party developers use Catalyst, so once Catalina ships, we’ll see a flowering of new Mac apps coming over from iOS.

Another new technology, Sidecar, lets you use an iPad as a second screen for a Mac, either wired or wirelessly. Sidecar even enables you to use the iPad and Apple Pencil as a graphics tablet with apps that support such an input method. Two other new features will let you use a Sidecar-connected iPad to mark up any PDF or insert a sketch into a Mac document.

Catalina promises many more features, including some that will increase macOS security and others that will make the Mac much easier to use for people with disabilities. For instance, the new Voice Control capability lets you run a Mac (or an iOS device) entirely with your voice—it’s amazing.

If you’re running Mojave now, you’ll be able to run Catalina too since the system requirements remain the same.

iOS 13

With iOS 13, Apple appears to be focusing once again on performance and refinements. The company claimed we’ll see faster Face ID recognition, smaller app downloads and updates, and quicker app launches.

The most apparent new feature will be Dark Mode, which Apple is bringing over from Mojave. It displays light text on a dark background, which can be welcome when using an iOS device in a dark room without bothering others. It also may increase battery life on OLED-based iPhones like the iPhone X, XS, and XS Max. But keep in mind that research shows the human eye and brain prefer dark text on light backgrounds, so you may read more slowly and with less recall in Dark Mode.

Along with the apps mentioned previously that also improve in iOS, Apple said it has rebuilt Maps and its underlying database from the ground up, so you’ll see far more detailed maps, and you can zoom in for a street-level photographic view called Look Around. 

Camera and Photos received attention as well, giving you faster access to effects and letting you apply effects to videos as well. You can even crop and rotate videos taken in the wrong orientation—finally!

Other improvements include a new Sign In with Apple option for signing in to apps using your Apple ID, full text formatting in Mail, shared folders in Notes, SMB sharing in Files, iCloud Drive folder sharing, and support for USB thumb drives.

In terms of system requirements, iOS 13 drops support for some older devices, leaving the iPhone 6s, 6s Plus, and SE as the oldest iPhones supported, along with just the newest iPod touch. 

iPadOS

Joining Apple’s other operating systems this year is iPadOS, a superset of iOS 13 that provides additional iPad-only features. In some ways, it’s nothing new, since the iPad has always had unique features, but it shows how Apple wants to differentiate the iPad from the iPhone.

In iPadOS, the Home screen holds more icons in a tighter grid, and you can pin the Today View widgets on the side of the screen. Safari will be able to support complex Web apps like Google Docs, Squarespace, and WordPress, and it gains a download manager that lets you download files into the Files app.

Apple enhanced iPad multitasking so you can switch between apps in a Slide Over view, open multiple windows from the same app in Split View, and use App Exposé to navigate among your app combinations. Plus, text editing improves significantly, with direct access to the cursor and easier text selection, as well as new three-finger gestures for cut, copy, paste, and undo. The iPad even gets full-featured font management, and you’ll be able to buy fonts from the App Store.

iPadOS won’t work on many older iPad models, though it is compatible with all iPad Pro models, the fifth- and sixth-generation iPad, the iPad mini 4 and fifth-generation iPad mini, and the iPad Air 2 and third-generation iPad Air.

watchOS 6

With watchOS 6, Apple is working hard on health and fitness capabilities for the Apple Watch. The company has added a Noise app that can warn you when sounds approach dangerous levels and a Cycle Tracking app that helps women monitor their periods and predict windows of optimal fertility. And, the Activity app has picked up trending features so you can see how you’re doing across time in a number of health metrics.

Apple has also untethered the Apple Watch from the iPhone to an extent, allowing developers to create standalone watch apps that don’t require a companion iPhone app and opening an App Store for such apps that you can browse and search from your wrist.

Other new watchOS 6 apps include Audiobooks, Calculator, and Voice Memos. Plus, once you upgrade to watchOS 6, you’ll be able to choose from more faces and additional complications.

As with watchOS 5, watchOS 6 will work on all Apple Watch models other than the original unit, but not all features are available on all models.

tvOS 13

The big news for tvOS 13 is that it finally gets multi-user support, so everyone in a household will be able to have their own personalized experience. (Speaking of which, the HomePod will also support multiple users with iOS 13.) 

Apple has redesigned the tvOS Home screen to show previews, added a slide-in Control Center like in iOS and watchOS, and updated the Music app to show lyrics in sync with the currently playing song. The screensaver also goes under the ocean so your cat can be entertained by all the fish.

Finally, in a move that will significantly enhance the forthcoming Apple Arcade game subscription service, both tvOS and iOS will support the Xbox One S and PlayStation DualShock 4 game controllers.

Mac Pro and Pro Display XDR

Although the Worldwide Developer Conference is mostly about Apple’s operating systems, the company took advantage of the keynote to show off the completely redesigned Mac Proand its companion screen, the Pro Display XDR. The technical specs of both are astonishing—Apple has done what looks like a fabulous job of designing the most modular, flexible, and powerful Mac ever, combined with a display that competes against reference monitors costing tens of thousands of dollars.

The Mac Pro will rely on Intel Xeon W processors with 8 to 28 cores, and you’ll be able to configure it with up to 1.5 TB (that’s terabytes!) of RAM. It has eight PCI Express expansion slots, into which you can install MPX modules that contain up to four AMD Radeon Pro graphics cards for massive number crunching performance. Another slot can hold Apple’s new Afterburner accelerator card for ProRes and ProRes RAW video acceleration, and a half-length slot contains Apple’s I/O card with two USB-3 ports, two Thunderbolt 3 ports, and to 10 Gb Ethernet ports; there are two more Thunderbolt 3 ports on the top of the case. Storage starts at 256 GB of SSD and goes up to 4 TB.

All this fits into a stainless steel frame with an aluminum case that lifts off to provide access to all sides of the Mac Pro. It has a massive 1.4-kilowatt power supply and relies on three fans and a blower to keep the unit cool. It even has handles on the top and optional wheels in case you need to move it around regularly.

Accompanying the Mac Pro will be Apple’s first monitor in years, the Pro Display XDR. It’s a 32-inch 6K screen that supports P3 wide and 10-bit colorthat can display more than 1 billion colors accurately. It’s also incredibly bright and can sustain 1000 nits of full-screen brightness or peak at up to 1600 nits.

If your eyes glazed over reading those specs, this new hardware isn’t for you. Apple is aiming it at high-end professionals, the sort of people who happily spend many thousands of dollars on new hardware to enable faster video editing, data processing, or other performance-intensive tasks. The base-level Mac Pro will start at $6000, and the Pro Display adds another $5000. Even the Pro Stand (which provides tilt and height adjustment, plus rotates to portrait orientation) for the Pro Display costs $1000, so a tricked-out Mac Pro setup could easily exceed $20,000. So no, this is not a Mac for “the rest of us,” but it’s great to see Apple ensuring that the most demanding Mac users can stay on the platform.

(All images courtesy of Apple)

MacTLC: Tip of the week

Beware Microsoft Office 365 Phishing Attacks!

We’re seeing an uptick in email phishing attacks purporting to come from Microsoft about Office 365. They’re quite convincing messages that tell users that their credit card payment has failed, that an account needs renewing, or that a password needs to be confirmed. Needless to say, they’re all complete scams, and clicking a link in them takes you to a malicious Web page that will try to steal your password or credit card details. As we noted in “Gone Phishing: Five Signs That Identify Scam Email Messages,” large companies neversend email asking you to click a link in order to log in to your account, update your credit card information, or the like. Hover over links to see where they go before clicking anything, and stay safe out there!

Office-365-phishing

Need to Merge Photos Libraries? Here Are Your Options

Photos makes it easy to create and switch between libraries. That’s good when photos need to be kept completely separate. For instance, a real estate agent might want to keep personal photos separate from house photos taken for work. But too much separation is annoying—you have to keep switching between libraries, and it’s easy to import new photos into the wrong one.

If you struggle with multiple Photos libraries, never fear—you can merge them. Unfortunately, the process is slow, can require a lot of disk space, and may result in the loss of some metadata. You have three options: merging through iCloud Photos, using the PowerPhotos utility, and merging by exporting and importing. Each has pros and cons.

Merge through iCloud Photos

Apple’s iCloud Photos service offers the best solution for merging libraries. The trick is that whenever you designate a library as your System Photo Library, Photos automatically uploads all images that aren’t already present, adding them to the photos already in iCloud Photos. It also retains all the metadata surrounding your photos—titles, keywords, albums, facial recognition, projects, and more.

On the downside, using iCloud Photos almost certainly won’t be free unless you have so few photos that the combined library will fit within the free 5 GB of iCloud space Apple gives everyone. Almost everyone will have to pay for additional storage space($0.99 per month for 50 GB, $2.99 for 200 GB, or $9.99 for 2 TB) for at least the month in which you’re doing the merge. iCloud Photos is a good service, so it’s likely worth paying for anyway.

More problematic is that the iCloud Photos way of merging will be very slow. If you haven’t already started using it, it could take a week or more to upload many thousands of photos. Plus, it will probably download the entire cloud-based collection of photos to each library whose photos you want to merge, so you may need a lot of local disk space too.

If you haven’t previously used iCloud Photos, go to System Preferences > iCloud and click the Options button next to Photo. In the dialog, select iCloud Photos.

merge-Photos-iCloud-Photos

Now, starting with the smallest Photos library and working up in size, follow these steps for each library you want to merge:

  1. Double-click the Photos library to open it.
  2. In Photos > Preferences > General, click Use as System Photo Library. (If it’s dimmed out, that library is already set as the System Photo Library.)

merge-Photos-System-Library


3.  Wait for photos to upload. Scroll to the bottom of the Photos view to see the progress. A Pause link will appear there during uploading—click it if you need to keep Photos from overwhelming your Internet connection. Once the photos have all uploaded, go back to Step 1 with your next Photos library.

When you’re done, the last Photos library becomes the one you’ll keep, and you can delete the others. Needless to say, make sure you have good backups first!

Merge with PowerPhotos

The $30 PowerPhotosfrom Fat Cat Software provides a variety of extra capabilities when working with Photos. It helps you to create and manage multiple libraries, copy photos between libraries, find duplicates, and—most important for this topic—merge libraries.

Because PowerPhotos is working entirely on your Mac’s drive, it’s fast and it doesn’t require huge amounts of extra disk space. Unfortunately, unlike the iCloud Photos approach, which brings in both originals and any edits to those photos, PowerPhotos can import only your original photos or the versions that you’ve edited, not both. Plus, it can’t merge facial recognition data, smart albums, or print projects.

PowerPhotos provides an actual interface for merging too—choose Library > Merge Libraries to start.

merge-Photos-PowerPhotos

In the window that appears, you have four tasks:

  1. Choose source libraries. You aren’t limited to merging just two libraries; you can pick multiple sources.
  2. Choose the destination library. This is the library you want to receive all the photos. If you want, you can create a new one.
  3. Configure duplicate handling. PowerPhotos can import just one of several copies of duplicate photos, or you can bring in all the duplicates if that’s important.
  4. Choose options. PowerPhotos can merge album contents, create an album from each source library, and create a backup before merging. Most important, though, is the choice of whether to merge your original photos or the edited versions.

Merge by Exporting and Importing

This final option is conceptually simple. You export all the photos from one library and then import them into another. It’s even what Apple recommends. The main thing it has going for it is that it’s free, and it will be faster than the iCloud Photos approach. It could also be useful if you want to copy a subset of photos between libraries, rather than merging all photos.

However, as with PowerPhotos, you have to choose between original and edited photos, and you’ll need a lot of extra disk space. Even worse, you’ll lose even more metadata, including albums, faces, and print projects. And if you export as JPEG, your photos may also suffer a slight quality drop as they’re recompressed.

For those who want to use this approach, Apple provides detailed instructions. In essence, you’ll click Photos in the sidebar to see everything, and then choose Edit > Select All. Then you’ll choose File > Export and either Export XPhotos (to get the edited versions of images) or Export Unmodified Original for XPhotos (to get the original images). Once everything has exported, you’ll switch libraries in Photos and then drag the folder of exported images back into Photos to import it.

Our nod goes to the iCloud Photos technique, but PowerPhotos is a fine utility for those who aren’t perturbed by its limitations. Of course, don’t start any merging without making backups first, and if you need help, don’t hesitate to call us.


Choosing a Cloud-Based File Sharing Service

Macs haven’t had removable storage for years, so when you want to move files between computers, you can use USB flash drives, email, Messages, AirDrop, or local file sharing. Those techniques are fine, but for a more efficient, effective, and elegant solution, try a cloud-based file sharing service.

These services use special software to integrate into the Mac’s Finder, designating a particular folder to hold shared files. Whenever you add a file to that folder—or any subfolder inside it—the software automatically uploads it to the cloud and downloads it to linked devices. File changes and deletions sync quickly, so the shared folder remains in sync everywhere at all times. iOS’s Files app also provides a single interface to the main services on your iPhone or iPad.

File sharing services provide two key capabilities:

  • They allow you to share files between your own devices, including Macs, iPhones, iPads, and Windows-based PCs. This makes it easy to access your data wherever you are and on whatever device you’re using.
  • They let you share files or folders with others, sometimes with permissions- or date-based restrictions. Such capabilities are incredibly effective for workgroup collaboration.

Numerous cloud-based file sharing services exist, but the most popular are Box, Dropbox, Google Drive, iCloud Drive, and Microsoft’s OneDrive, all of which offer free plans with limited amounts of storage.

File-Sharing-Box-iconBox

Boxis aimed primarily at large enterprises, with plans priced at $5, $15, or $25 per user per month. The main differences between those plans revolve around things like the number of users, administrative controls and security reporting, and custom branding. Box integrates with hundreds of apps and offers a platform on which companies can build their own collaboration and workflow solutions.

Box also offers a free Individual plan with 10 GB of storage. A Personal Pro plan costs $10 per month, but that provides only 100 GB of storage, much less than the competition.

Dropbox

The 800-pound gorilla of the file sharing space is Dropbox, which popularized the concept starting in 2007. A free Basic account offers 2 GB of storage space, but for $9.99 per month, the Plus plan gives you 1 TB and the $19.99 Professional plan doubles that to 2 TB and provides additional controls. If you

File-Sharing-Dropbox-icon

need to share a folder with someone, Dropbox is generally the best option because so many people already have accounts.

For teams, Dropbox Business provides Standard ($12.50 per user per month) and Advanced ($20 per user per month) plans that increase the space even further and add administrative controls, increased security options, and more.

Google Drive

Conceptually, Google Driveis where Google Docs, Google Sheets, and Google Slides store their files. However, it also lets you store any type of file, and Google provides 15 GB of free storage with every Google account. For those who need more storage, Google offers a variety of storage tiers, including 100 GB ($1.99 per month), 200 GB ($2.99), and 2 TB ($9.99).File-Sharing-Google-Backup-Sync-icon

Google Drive Enterprise extends the service for teams with additional collaboration, workflow, and security tools. It’s priced at $8 per active user per month plus $0.04 per gigabyte of data stored. If you want the full G Suite, which includes Gmail, Google Docs, video conferencing, team messaging, and shared calendars, $6 per user per month buys 30 GB of storage and $12 per user per month buys unlimited storage.

Google generally assumes you’ll do everything in a Web browser or a smartphone app, but with the company’s Backup and Syncsoftware for the Mac, it provides the same level of Finder integration as other services.

iCloud Drive

Although Apple’s iCloud Driveis deeply integrated into macOS and iOS and numerous apps, it’s the weakest of the file sharing services. That’s because Apple focuses on individuals, not groups or teams. iCloud Drive works fine for sharing files among your own devices, and it allows you to share individual files (but not folders) with anyone who has an Apple ID.File-Sharing-iCloud-Drive

Apple gives all Mac and iOS users 5 GB of free space in iCloud Drive, although things like iCloud backups of your iOS devices can use that up quickly. For $0.99 per month, you can get 50 GB, $2.99 per month gets you 200 GB, and 2 TB costs $9.99 per month. There are no business plans, but you can share the purchased space with other members of a Family Sharing group.

OneDrive

Most of Microsoft’s Office 365 subscriptions include OneDrivestorage—a $99.99 per year Office 365 Home plan provides 1 TB for each of up to six File-Sharing-OneDriveusers, whereas a $69.99 Office 365 Personal subscription is for just one user. On the business side, you can pay $5, $8.25, or $12.50 per user per month for different Office 365 plans. The low-end plan doesn’t include the desktop versions of the Office apps, and the high-end plan provides Exchange, SharePoint, and Teams in addition to all the Office apps and 1 TB of OneDrive storage for each user.

How to Choose a Service

Which of these services is best for your needs? That’s a potentially complicated question, and we’re happy to talk with you directly to make a recommendation. That said, here are the basics.

If you mostly need to share files among your own devices and want to share the occasional file with another Apple user, iCloud Drive may be sufficient, especially if you are already paying for more storage for iCloud Photos. Those who are heavily invested in Google’s G Suite or Microsoft Office 365 should focus on Google Drive or OneDrive. If you aren’t already in bed with Google or Microsoft, Dropbox is the best bet for most individuals and groups, although larger organizations should also evaluate Box.

Running Low on Space on Your Mac? Here’s How to Clear Unnecessary Data

SSDs are great—they’re fast, durable, and reliable—but they’re also expensive, which results in many of us not having as much storage built into our Macs as we’d like. Particularly for those who watch videos in iTunes or take a lot of photos, it’s all too easy to run out of space on your Mac’s internal drive.

MacPaw’s CleanMyMac Xis a great solution for those who don’t mind its $35 price tag. This utility can help you identify and remove unnecessary data to free up space. It can ferret out forgotten downloads, old videos, mammoth folders, bloated caches, outdated iOS updates and backups, copies of iOS apps, and more. It also boasts other features that can improve performance, protect your Mac from malware, and keep your apps up to date.

But if you want to go the belt-and-suspenders route, you can use Apple’s built-in tool for cleaning house: Storage Management.

Apple hid Storage Management inside the System Information app, but there’s a shortcut for accessing it. Choose  Apple > About This Mac, click the Storage button, and then click Manage… but wait! Before you click Manage, look at the About This Mac window’s Storage view.

Storage-Management-About-This-Mac

Hover over each colored bar to see how much space is taken up by a particular type of data. The white space at the end of the bar shows space that’s still available. You can’t do much here, but the view gives you a quick overview of your usage.

When you click Manage, System Information launches, and the Storage Management window appears. (You can also open System Information manually and choose Window > Storage Management.) In the sidebar at the left, ignore Recommendations and look at the rest of the categories, particularly Applications, Documents, and iOS Files. The specific categories will vary a bit between Macs, depending on what apps you use, but they correspond to the colored bars you saw in the About This Mac window’s Storage view.

Applications

The Applications category lists your apps and is sorted by size by default. But try clicking the column header for Kind and scrolling down. You can probably trash most apps tagged as Duplicates or Older Versions. Similarly, click the Last Accessed column header to see which apps you haven’t launched in years. Many of them can probably go. Plus, you can redownload anything tagged as coming from the App Store, so you can toss those apps to save space.

Storage-Management-Applications

Documents

In Documents, you’ll see three buttons: Large Files, Downloads, and File Browser. Large Files focuses on files over 50 MB in size, Downloads displays the contents of your Downloads folder (much of which you likely don’t need), and File Browser gives you a column view that’s sorted by file size and shows sizes next to each item. It’s great for trawling through your drive to see what’s consuming all that space.

Storage-Management-Documents

In any of these views other than File Browser, hover over any item to see an X button for deleting the file and a magnifying glass button that reveals the file in the Finder. To delete multiple files at once, Command-click or Shift-click to select them and then press the Delete key to remove them all at once. Storage Management gives you the combined size of all the selected files and warns you before deleting the files, so you can use this technique to preview how much space a multi-file deletion will save.

In File Browser, select one or more files and either drag them to the Trash icon in the Dock, or press Command-Delete.

iOS Files

If you’ve used iTunes to manage iOS devices in the past, pay special attention to the iOS Files category. It shows any device backups and software updates that are stored on your Mac’s drive. If you still use iTunes to back up your device, it’s worth keeping the latest backup of devices you still use, but many people have obsolete backups and unnecessary updates kicking around.


Storage-Management-iOS-Files

Other

As noted before, the rest of the categories here may vary depending on what apps you use. With Books and iTunes, you can remove content that you’ve purchased, since you can download it again. With Mail and Photos, Storage Management merely tells you how much space the app’s data occupies and lets you enable space optimization (downloading only recent attachments for Mail, and keeping only optimized photos on the Mac). To save more space, you must delete unnecessary data from within the app itself.

If your Mac’s drive is filling up—if it has less than 10 percent free space—consider using the Storage Management tools to search out and delete files that are wasting space. To be safe, make a backup first!

Collaborate with Colleagues in Google Docs.

Collaboration is what all the cool kids—well, all the competitive businesses—are doing these days because it’s efficient and effective. See “Stop Mailing Files Around and Use Collaborative Apps” and for users of Apple’s iWork, “Collaborate with Colleagues in Pages, Numbers, and Keynote.” Today we’re going to look at collaborating using Google’s Web-based productivity suite, Google Docs, which businesses can use for free or as part of a G Suitesubscription.

The Google Docs suite competes with Apple’s iWork and Microsoft’s Office 365, providing Google Docsfor word processing, Google Sheetsfor spreadsheet work, and Google Slidesfor presentations. You can manage all your files in Google Drive. Although all are Web-based and work best on a Mac or other desktop computer, Google also makes iOS apps that let you work—a bit less flexibly—on an iPad or iPhone.

You’ll need a free Google account to create new documents, and for full-fledged collaboration, your colleagues will need Google accounts too. You can share documents with people who lack Google accounts or don’t want to sign in, but their comments and changes will be anonymous.

Invite Collaborators

Once your document is ready to share, you can invite collaborators by clicking the large Share button in the upper-right corner of the window.

Flexible permissions let you share with specific people, and for each person, set whether they can edit, comment on, or just view the document (below left). You can also add a note that will be sent with the invitation.

Share-dialogs

If that’s too specific—you’re sharing with a large group, for instance—click Get Shareable Link to turn on link sharing (above right). Then you can set the permissions for the link by clicking the down-pointing arrow next to “Anyone with the link can…” This works well for things like self-service signup spreadsheets. Copy the link and send it however you like, such as via Messages or to a mailing list.

If you add people over time, you can see who has access by clicking Advanced. That view also provides more owner controls, including the option to prevent commenters and viewers from downloading, printing, or copying.

When you’re done, click Send or Done.

Accept an Invitation

People you invite receive an email invitation and click the Open In button to start working on the document. With link sharing, all the recipient has to do is click the link.

Accept-Google-invite

The main gotcha is that recipients must sign in to their Google accounts if sharing has been restricted to specific people. A less common problem can occur when you send an invitation to someone at an email address that doesn’t match their Google account, which prevents them from collaborating. They can then request that you share the document with their Google account; click the Open Sharing Settings button in the request email to grant access.

Request-access-email

Add and Change Data

Apart from the permissions that restrict collaborators to commenting or viewing, there are no limitations on what people can do in a shared document—all editors are equal, and Google Docs works the same whether a document has one person using it or ten.

You can see who is in the document by the little avatar icons in the menu bar. It also tells you when the last edit was, and Google Docs always shows where other users are working with a color-coded cursor and marks when other users have selected content in the document with a colored highlight box.

Using-Google-Slides

Add Comments

The beauty of comments in a collaborative scenario is that discussions can occur in context. To add a comment, select some text and choose Insert > Comment. Comments show up in the right-hand sidebar in Google Docs and Google Slides; in Google Sheets, the cell containing a comment gets a little yellow triangle in the corner, and the comment appears when you click the cell.

Google-Docs-comments

Google pioneered comment conversations, which allow collaborators to reply to each others’ comments and keep the discussion connected to the initial comment. You can edit or delete your own comments by clicking the stacked three-dot More menu. Do that for someone else’s comment and you can get a link to the comment—it’s useful if you need to point someone to the discussion.

To see all the comments in a stream, click the Comment History button in the menu bar, which looks like a speech balloon. It’s especially useful when reviewing comments in Sheets, where you would otherwise have to click all the little yellow triangles in cells.

Google-Docs-comment-stream

View Versions and Suggested Changes

The main way to see who has done what in a document is by choosing File > Version History > See Version History. That displays a right-hand sidebar showing dates when the file was changed; click an entry to see the changes in the main pane. Arrows above the main pane let you highlight each change in turn. If you want to revert to the selected version (which will delete all subsequent changes!), click Restore This Version.

Version-history

For Google Sheets and Google Slides, version history is all that’s available, which can be frustrating because when you’re reviewing edits in version history, you can’t make changes. As a workaround, open a second browser window so you can review changes in one window and make edits in another.

Google Docs (the word processor, in this case) offers another choice: Suggesting mode, which works more like Track Changes in Page or Word. Switch into it by clicking the pencil icon in the upper-right corner and choosing Suggesting. From then on, all edits are non-destructive and are color-coded by the person who makes them. They’re coupled with boxes in the right-hand sidebar that detail the change, provide ✔ and X icons for accepting or rejecting the change, and offer a Reply field that enables discussions of each change—a brilliant feature.

Suggesting-mode

If you want to be guided through all the suggested edits, or accept or reject changes all at once, rather than handling them one at a time in the right-hand sidebar, choose Tools > Review Suggested Changes.

Review-Suggested-Edits

When you’re done collaborating on a document, you can click the Share button and remove people or turn off link sharing. That immediately prevents others from making more changes.

When choosing a collaboration platform, you’ll generally pick what your colleagues use, whether that’s Google Docs, iWork, or Office 365. However, if you’re sharing with people whose platform and app details you don’t know, Google Docs is the best choice—Google accounts are common and the Google Docs apps work equally well on all computers. Plus, since Google Docs was built from the ground up for collaboration, it’s a mature solution that’s quick, easy, and effective.


What’s with All These Dialogs Saying, “SomeApp is not optimized for your Mac”?

If you’re running macOS 10.13.4 High Sierra or macOS 10.14 Mojave, you may have seen a dialog that says an app isn’t optimized for your Mac. The message differs slightly between High Sierra and Mojave, with the High Sierra version telling you the developer needs to update the app to improve compatibility whereas Mojave saying bluntly that the app won’t work with future versions of macOS.

64-bit-app-Levelator-warning64-bit-app-BCC-warning

What’s going on here, what should you do, and when should you do it?

What’s Going On: 32-bit and 64-bit Apps

Over a decade ago, Apple started to transition all the chips used in Macs, along with macOS itself, from a 32-bit architecture to a 64-bit architecture. Without getting into technical details, 64-bit systems and apps can access dramatically more memory and enjoy significantly faster performance.

Apple knew it would take years before most people were running 64-bit hardware and 64-bit-savvy versions of macOS, so it allowed macOS to continue running older 32-bit apps. However, maintaining that backward compatibility has a cost, in terms of both performance and testing, so at its Worldwide Developer Conference in 2017, Apple warned developers that High Sierra would be the last version of macOS to support 32-bit apps “without compromise.” At the next WWDC in June 2018, Apple announced that macOS 10.14 Mojave would be the last version of macOS to run 32-bit apps.

Happily, the only “compromise” for 32-bit apps in Mojave is the warning dialog, which appears every 30 days when you launch an older app. But the writing is on the wall: 32-bits apps will cease working in macOS 10.15.

How Do You Identify 32-bit Apps?

Apple provides a tool to help you find 32-bit apps. Follow these steps:

  1. From the Apple menu, choose About This Mac and then click the System Report button.
    64-bit-About-This-Mac
  2. In the System Information utility that opens, scroll down to Software in the sidebar and select Applications. It may take a few minutes to build the list of every app on all mounted drives.
  3. When it finishes, click the 64-bit column header (No means 32-bit; Yes means 64-bit) to sort the list, and select an app to see its details in the bottom pane.
    64-bit-app-System-Information-apps

This technique works in both High Sierra and Mojave, but in Mojave, System Information includes a better-formatted section, called Legacy Software, that also provides a list of 32-bit apps. However, this list may be smaller because it includes only those apps that you’ve launched. Since it’s likely that you open old 32-bit apps only occasionally, you can’t trust the Legacy Software list to be complete.

64-bit-app-System-Information-Legacy-Software

If you find System Information’s Applications list overwhelming, check out the free 32-bitCheckutility from Howard Oakley. It performs exactly the same task but lets you focus on a particular folder and save the results to a text file for later reference.

64-bit-app-32-bitCheck

What’s Your Next Step?

Once you know which apps won’t work in macOS 10.15, you can ponder your options. Luckily, you have some time. We expect Apple to release macOS 10.15 in September 2019, but you don’t need to upgrade right away—in fact, we recommend that you wait a few months after that to allow Apple time to fix bugs.

That said, we do encourage upgrading eventually, and if you buy a new Mac after September 2019, it will come with macOS 10.15. So you need to establish a plan—it’s better to know what you’re going to do than to be forced into action if you have to replace your Mac on short notice. For each 32-bit app on your Mac, you have three options:

  • Delete it:It’s not uncommon to have old apps that you haven’t used in years and won’t miss. There’s no need to waste drive space on them in macOS 10.15.
  • Upgrade it:Apps in active development will likely have a new version available. The main questions are how much the upgrade will cost and if there are compatibility issues associated with upgrading. You can upgrade at any time, although it’s likely worth waiting until you’re ready to move to macOS 10.15 to minimize costs. The apps that cause the most irritation here are things like the Adobe Creative Suite—Photoshop, Illustrator, and InDesign—that require switching to a monthly subscription.
  • Replace it:If no upgrade is available, the cost of upgrading is too high, or upgrading comes with other negatives, it’s time to look for an alternative. This can take some time, so it’s worth starting soon to ensure that the replacement will provide the features you need before macOS 10.15 forces the decision.

Needless to say, if you’d like recommendations about how to proceed with any particular app or workflow, get in touch with us!

MacTLC: Tip of the week

Here’s How to Capture a Full-Screen Screenshot of a Web Page

You know that Command-Shift-3 takes a screenshot of the entire screen and Command-Shift-4 lets you pick a window, menu, or arbitrary selection for your screenshot. And Mojave introduced Command-Shift-5 to give you an interface to screenshots and screen recordings. But how would you capture a screenshot of a long Web page that requires scrolling? Rather than stitching multiple screenshots together, try this trick in the Google ChromeWeb browser. Control-click anywhere on a page you want to capture and choose Inspect. Press Command-Shift-P to open Chrome’s Developer Tools command menu. Type “capture” and then click “Capture full size screenshot” to download a screenshot of the page as a PNG file. (When you’re done, close the Developer Tools by clicking the X in the upper-right corner.)

Chrome-capture-screenshot

Ever Wanted to Get a Custom Email Address? Here’s How (and Why)

Some facts about ourselves are difficult or impossible to change, but your email address doesn’t have to be one of them. Switching to a custom email address might seem overwhelming, and it will take some time, but it’s not that hard or expensive (and we’re always happy to help if you get stuck).

Why Consider Switching to a Custom Address?

Why would you want to take on such a task? Independence. If you’re using the email address that came from your Internet service provider, you could end up in an awkward situation if you have to move and switch ISPs. Any address that ends in @comcast.net, @anything.rr.com, @verizon.net, @earthlink.net, or the like could be problematic. You also don’t want to rely entirely on a work email address—there’s no guarantee that your employer will forward email for you indefinitely if you take a different job.

Also, an email address says something about you, much as a postal address does—there’s a difference between an address on Central Park versus one in the Bronx. If you’re not happy with what your email address implies, you might want to switch.

What can an email address reveal? Those with a free Juno, Hotmail, or Yahoo account likely signed up years ago and don’t take email very seriously. People who use an @icloud.com, @me.com, or @mac.com address are clearly Apple users, and those with an address ending in @live.com, @msn.com, or @outlook.com are probably Windows users. .edu addresses identify students, teachers, and school employees—but if you’re not one anymore, your email looks like you’re wearing a varsity jacket in your 40s. The big kahuna of email is Gmail, which boasts about 1.5 billion users worldwide now—as a result, using a Gmail address is fairly generic.

The ultimate in independence comes when you register your own domain name, which usually costs less than $20 per year at sites like 1&1 Ionos, Domain.com,easyDNS, Directnic, and Register.com. Then your address can be anything you want at your new custom domain, and you never again have to worry about being tied to your ISP or associated with a free email host.

How to Change to a Custom Address

Step 1:Register a new domain name. The hard part here is thinking of a name that hasn’t already been taken. It’s best to stick with the traditional top-level domains like .com, .net, and .org—if you get into the new ones like .beer (yes, that’s available), your email is a bit more likely to be marked as spam. Most domain registrars will also host your email for you, and if you go this route, you can skip Step 2.

Step 2:If you’re already using Gmail or another independent email provider that isn’t tied to your ISP, log in to your account at your domain registrar and configure it to forward all email to your existing email address. In this case, you can skip Steps 3 and 4.

However, if you aren’t happy with your current email provider, you’ll need to set up an account with a new one. There are lots, but many people use a paid email provider like FastMailor easyMailthat usually charges less than $50 per year and supports multiple mailboxes. When you set up the account, you’ll need to create one or more new email addresses at the provider and configure MX (mail exchange) records with your domain registrar—the service will provide instructions for this.

Step 3:If you’re changing email providers as part of this process, you’ll need to configure Mail—or whatever email client you’re using—to connect to your new email account with the login credentials you set up. That’s not hard, but being able to send email that comes from your custom address can require some effort with the free email providers. Gmail provides instructions, and others that support this feature will as well. Unfortunately, iCloud won’t let you send email using a custom address.

Step 4:If you’re moving to a new email provider, you’ll need to forward your mail from your old provider to your new custom address. Most email providers and ISPs have a screen somewhere in the account settings of their Web sites that lets you enter a forwarding address.

Step 5:Tell your family, friends, and colleagues about your new email address, and update mailing lists and accounts at sites like Amazon that send you email. The forwarding you set up in the previous step will ensure you don’t miss anything during the transition, but remember that if you cancel your old ISP account, that forwarding may end immediately, so it’s important to start the process well in advance.

The details will vary depending on your choice of domain registrar and email provider, so again, if you would like additional recommendations or assistance in setting all this up, just let us know.

Considering a New iMac? Wait No Longer—Updates Are Here!

The iMachas long been the core of Apple’s desktop lineup, but it hasn’t received any updates since June 2017. Now, however, Apple has quietly updated the 21.5-inch iMac with Retina 4K display and the 27-inch iMac with 5K Retina display while keeping prices the same. The bargain-basement non-Retina 21.5-inch iMac remains for sale, but received no changes.

iMac-21-and-27

These updates are targeted at improving performance, so you won’t see any changes to the case, screen, or even networking capabilities. But if faster CPUs, GPUs, and memory are what you want, now’s a good time to buy.

The new 21.5-inch iMac boasts speedier 8th-generation Intel quad-core processors and an optional 6-core processor at the top of the line that deliver up to 60% faster performance than previous models. For even greater speed boosts—Apple claims up to 2.4 times faster performance—look to the 27-inch iMac, which now offers 9th-generation 6-core Intel Core i5 processors running at 3.0, 3.1, or 3.7 GHz. If that’s not enough, you can choose an 8-core 3.6 GHz Intel Core i9 processor for the best performance short of an iMac Pro.

Modern computers rely heavily on graphics processors for both silky smooth screen drawing and computationally intensive tasks. By default, both new iMac models have updated versions the previous Radeon Pro graphics chips, but anyone who needs more power can instead choose a blazingly fast Radeon Pro Vega. For the 21.5-inch model, Apple says the Radeon Pro Vega is up to 80% faster; for the 27-inch iMac, it’s up to 50% faster.

Note that both iMacs now use 2666 MHz RAM instead of the previous 2400 MHz RAM. It probably won’t make much of a performance difference, but it’s worth keeping the speed in mind if you’re buying RAM separately from the iMac.

For those ordering an iMac from the online Apple store, if the options you want are in the top-level configuration, start there rather than in the next configuration down. It’s possible to configure two Macs to have the same options for the same price but get a better Radeon Pro graphics processor if you start from the top-level configuration.

For storage, we generally recommend SSDs over Fusion Drives—add external storage if you need more space. Whatever you do, don’t buy an iMac with an internal hard drive because it will destroy the performance.

For those looking for the ultimate power in aniMac Pro, Apple also quietly added options for 256 GB of RAM (for a whopping $5200) and a Radeon Pro Vega 64X GPU ($700) while simultaneously dropping the prices on some other RAM and storage options.